Though not widely discussed, this technique is useful for making saturation adjustments beyond what’s possible via Hue/Saturation alone.
The idea is to use Curves in Saturation Mode. (This doesn’t replace traditional Curves in any way; it’s is only for saturation adjustments.)
Adjusting saturation via Curves’ Saturation Mode lets you control saturation in a subtle way according to light-dark ranges. I often do Hue/Saturation first, then adjust Curves in Saturation Mode if that doesn’t quite do the trick. I use the method less than 25% of the time, but it helps punch up color areas that otherwise don’t differentiate well.
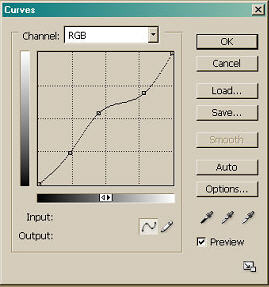
Generally, a slight S-curve works best, as with Curves in Normal Mode. You can produce intense effects using steep curves, just as in Curves/Normal, but subtle is the way to go, especially for landscapes. First, set three points at the three main vertical and horizontal intersections, then move these up and down one at a time to gauge the extent of the changes.
Moving a point in one direction tends to desaturate, while going the other way tends to add saturation. But, sometimes moving the point up will intensify some colors, while moving down will intensify others. This can be useful, but it can cause problems, too.
After experimenting with each point, you're ready to reset each point for keeps. The initial testing step is important because it’s hard to visualize what will happen with Curves/Saturation Mode.
Still, the technique lets you target particular areas in an image. Alternatives include: 1.) adjusting saturation by selecting areas using the Lasso tool before applying Hue/Saturation and 2.) defining color ranges via Select/Color Range as a prelude to Hue/Saturation. For me, Curves/Saturation delivers results hard to achieve with these other methods.
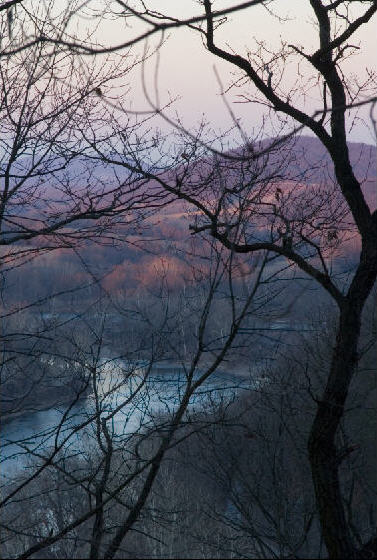
With landscapes, the goal is to punch up the image without making it look unnatural. Saturation adjustments, particularly aggressive ones using Curves/Saturation Mode, can go too far, so try hanging a photo on a wall for a few days to see how it wears. If you've taken things too far, you'll usually know in a day or so.
Step-by-Step
After backing up your image and applying any noise filtering, adjust as normal: Local-Area Contrast, Levels, Curves (in Normal Mode), and saturation via Hue/Saturation. Then:
1.) Select: Layers/Adjustments/Curves and set the Mode to Saturation, in the window that pops up.
2.) Experimental adjustments: Set the three points at the intersection of the three main vertical and horizontal lines in Curves. (The Curves /Saturation graph looks no different than Curves/Normal, so make sure you’ve selected Saturation Mode.) Now, move each point at least halfway up and down, to test the effect. As you proceed, reset each point so it rests on Curve's default straight diagonal line; then move on to the next point.
3.) Final adjustments. Once you’ve tried out all three points, you should know how to make the final adjustments to enhance saturation for keeps. Watch for color shifts, which might slip by if you’re not paying attention to all colors. The goal is to enhance saturation, not use this as a short-cut for changing hues.
4.) Complete the workflow. After you’ve made the adjustments, complete the workflow as you usually do and Save. Since the Curve/Saturation Mode adjustments are in a separate Layer, you can change them at any point in the future, so long as you haven’t flattened the Layers.
John Blackford, February 2007